Movendo o jogador com código
É hora de programar! Nós vamos usar as ações de entradas que criamos na última parte para movimentar o jogador.
Nota
Para esse projeto, vamos seguir as convenções de nomeação do Godot.
GDScript: Classes (nós) usam o estilo
PascalCase(IniciaisMaiúsculas), variáveis e funções usamsnake_case(minúsculas_separadas_por_sublinha) e constantes usamALL_CAPS(TODAS_MAIÚSCULAS) (Veja mais em Guia de Estilo GDScript).C#: Classes, export variables and methods use PascalCase, private fields use _camelCase, local variables and parameters use camelCase (See Guia de Estilo C#). Be careful to type the method names precisely when connecting signals.
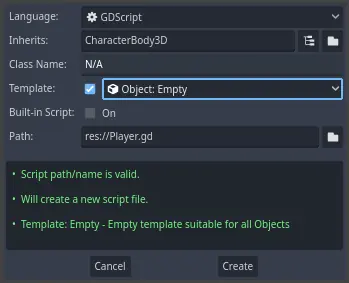
Right-click the Player node and select Attach Script to add a new script to
it. In the popup, set the Template to Empty before pressing the Create
button. We set it to Empty because we want to write our own code for
player movement.
Vamos começar com as propriedades da classe. Nós vamos definir a velocidade do movimento, a aceleração da queda representando a gravidade e a velocidade que usaremos para mover o jogador.
extends CharacterBody3D

# How fast the player moves in meters per second.
@export var speed = 14
# The downward acceleration when in the air, in meters per second squared.
@export var fall_acceleration = 75

var target_velocity = Vector3.ZERO
using Godot;

public partial class Player : CharacterBody3D
{
    // Don't forget to rebuild the project so the editor knows about the new export variable.

    // How fast the player moves in meters per second.
    [Export]
    public int Speed { get; set; } = 14;
    // The downward acceleration when in the air, in meters per second squared.
    [Export]
    public int FallAcceleration { get; set; } = 75;

    private Vector3 _targetVelocity = Vector3.Zero;
}
These are common properties for a moving body. The target_velocity is a 3D vector
combining a speed with a direction. Here, we define it as a property because
we want to update and reuse its value across frames.
Nota
Os valores são bem diferentes do código 2D porque as distâncias são em metros. Enquanto que no 2D, mil unidades (pixels) podem corresponder a somente metade da largura da tela, e no 3D, é um quilômetro.
Let's code the movement. We start by calculating the input direction vector
using the global Input object, in _physics_process().
func _physics_process(delta):
    # We create a local variable to store the input direction.
    var direction = Vector3.ZERO

    # We check for each move input and update the direction accordingly.
    if Input.is_action_pressed("move_right"):
        direction.x += 1
    if Input.is_action_pressed("move_left"):
        direction.x -= 1
    if Input.is_action_pressed("move_back"):
        # Notice how we are working with the vector's x and z axes.
        # In 3D, the XZ plane is the ground plane.
        direction.z += 1
    if Input.is_action_pressed("move_forward"):
        direction.z -= 1
public override void _PhysicsProcess(double delta)
{
    // We create a local variable to store the input direction.
    var direction = Vector3.Zero;

    // We check for each move input and update the direction accordingly.
    if (Input.IsActionPressed("move_right"))
    {
        direction.X += 1.0f;
    }
    if (Input.IsActionPressed("move_left"))
    {
        direction.X -= 1.0f;
    }
    if (Input.IsActionPressed("move_back"))
    {
        // Notice how we are working with the vector's X and Z axes.
        // In 3D, the XZ plane is the ground plane.
        direction.Z += 1.0f;
    }
    if (Input.IsActionPressed("move_forward"))
    {
        direction.Z -= 1.0f;
    }
}
Here, instead of _process(), we're going to make all calculations using the _physics_process()
virtual function. It's designed specifically for physics-related code like moving a
kinematic or rigid body. It updates the node using fixed time intervals.
Ver também
Para saber mais sobre a diferença entre _process() e _physics_process(), veja Processamento Ocioso e Físico.
Começamos inicializando uma variável direction para Vector3.ZERO. Em seguida, verificamos se o jogador está pressionando uma ou mais das entradas move_* e atualizamos os componentes do vetor x e z de acordo. Estes correspondem aos eixos do plano do solo.
Essas quatro condições nos dão oito possibilidades e oito direções possíveis.
In case the player presses, say, both W and D simultaneously, the vector will
have a length of about 1.4. But if they press a single key, it will have a
length of 1. We want the vector's length to be consistent, and not move faster diagonally. To do so, we can
call its normalized() method.
func _physics_process(delta):
    #...

    if direction != Vector3.ZERO:
        direction = direction.normalized()
        # Setting the basis property will affect the rotation of the node.
        $Pivot.basis = Basis.looking_at(direction)
public override void _PhysicsProcess(double delta)
{
    // ...

    if (direction != Vector3.Zero)
    {
        direction = direction.Normalized();
        // Setting the basis property will affect the rotation of the node.
        GetNode<Node3D>("Pivot").Basis = Basis.LookingAt(direction);
    }
}
Aqui, nós só normalizamos o vetor na direção que tem um comprimento maior que zero, o que significa que o jogador apertou uma tecla de direção.
Calculamos a direção para a qual o $Pivot está olhando criando um Basis que aponta na direção de direction.
Then, we update the velocity. We have to calculate the ground velocity and the
fall speed separately. Be sure to go back one tab so the lines are inside the
_physics_process() function but outside the condition we just wrote above.
func _physics_process(delta):
    #...
    if direction != Vector3.ZERO:
        #...

    # Ground Velocity
    target_velocity.x = direction.x * speed
    target_velocity.z = direction.z * speed

    # Vertical Velocity
    if not is_on_floor(): # If in the air, fall towards the floor. Literally gravity
        target_velocity.y = target_velocity.y - (fall_acceleration * delta)

    # Moving the Character
    velocity = target_velocity
    move_and_slide()
public override void _PhysicsProcess(double delta)
{
    // ...
    if (direction != Vector3.Zero)
    {
        // ...
    }

    // Ground velocity
    _targetVelocity.X = direction.X * Speed;
    _targetVelocity.Z = direction.Z * Speed;

    // Vertical velocity
    if (!IsOnFloor()) // If in the air, fall towards the floor. Literally gravity
    {
        _targetVelocity.Y -= FallAcceleration * (float)delta;
    }

    // Moving the character
    Velocity = _targetVelocity;
    MoveAndSlide();
}
A função CharacterBody3D.is_on_floor() retorna true se o corpo colidiu com o chão neste quadro. É por isso que aplicamos a gravidade ao Player apenas enquanto está no ar.
For the vertical velocity, we subtract the fall acceleration multiplied by the delta time every frame. This line of code will cause our character to fall in every frame, as long as it is not on or colliding with the floor.
O motor de física só pode detectar interações com paredes, com chão ou com outros corpos durante um determinado quadro se o movimento e a colisão acontecerem. Nós usaremos essa propriedade mais para frente quando fizermos o código para pular.
Na última linha, chamamos de CharacterBody3D.move_and_slide() que é um método poderoso da classe CharacterBody3D que permite mover um personagem sutilmente. Se atingir uma parede a meio de um movimento, o motor vai tentar suavisar para você. Ele usa o valor velocity nativo do CharacterBody3D
E isso é todo o código necessário para mover o personagem no chão.
Here is the complete player.gd code for reference.
extends CharacterBody3D

# How fast the player moves in meters per second.
@export var speed = 14
# The downward acceleration when in the air, in meters per second squared.
@export var fall_acceleration = 75

var target_velocity = Vector3.ZERO


func _physics_process(delta):
    var direction = Vector3.ZERO

    if Input.is_action_pressed("move_right"):
        direction.x += 1
    if Input.is_action_pressed("move_left"):
        direction.x -= 1
    if Input.is_action_pressed("move_back"):
        direction.z += 1
    if Input.is_action_pressed("move_forward"):
        direction.z -= 1

    if direction != Vector3.ZERO:
        direction = direction.normalized()
        # Setting the basis property will affect the rotation of the node.
        $Pivot.basis = Basis.looking_at(direction)

    # Ground Velocity
    target_velocity.x = direction.x * speed
    target_velocity.z = direction.z * speed

    # Vertical Velocity
    if not is_on_floor(): # If in the air, fall towards the floor. Literally gravity
        target_velocity.y = target_velocity.y - (fall_acceleration * delta)

    # Moving the Character
    velocity = target_velocity
    move_and_slide()
using Godot;

public partial class Player : CharacterBody3D
{
    // How fast the player moves in meters per second.
    [Export]
    public int Speed { get; set; } = 14;
    // The downward acceleration when in the air, in meters per second squared.
    [Export]
    public int FallAcceleration { get; set; } = 75;

    private Vector3 _targetVelocity = Vector3.Zero;

    public override void _PhysicsProcess(double delta)
    {
        var direction = Vector3.Zero;

        if (Input.IsActionPressed("move_right"))
        {
            direction.X += 1.0f;
        }
        if (Input.IsActionPressed("move_left"))
        {
            direction.X -= 1.0f;
        }
        if (Input.IsActionPressed("move_back"))
        {
            direction.Z += 1.0f;
        }
        if (Input.IsActionPressed("move_forward"))
        {
            direction.Z -= 1.0f;
        }

        if (direction != Vector3.Zero)
        {
            direction = direction.Normalized();
            // Setting the basis property will affect the rotation of the node.
            GetNode<Node3D>("Pivot").Basis = Basis.LookingAt(direction);
        }

        // Ground velocity
        _targetVelocity.X = direction.X * Speed;
        _targetVelocity.Z = direction.Z * Speed;

        // Vertical velocity
        if (!IsOnFloor()) // If in the air, fall towards the floor. Literally gravity
        {
            _targetVelocity.Y -= FallAcceleration * (float)delta;
        }

        // Moving the character
        Velocity = _targetVelocity;
        MoveAndSlide();
    }
}
Testando o movimento do nosso personagem
Nós vamos colocar nosso jogador na cena Main para testá-lo. Para isso, nós precisamos instanciar o jogador e depois adicionar a câmera. Diferente do 2D, no 3D você não vê nada caso a janela de exibição não tenha uma câmera apontada para algo.
Salve a cena Player e abra a cena Main. Você pode clicar na aba Main no topo do editor para fazê-lo.

Se você fechou a cena antes, vá até o painel Sistema de Arquivos e clique duas vezes em main.tscn para reabri-la.
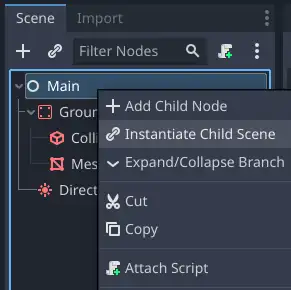
To instantiate the Player, right-click on the Main node and select Instantiate
Child Scene.
Na pop-up, de um clique duplo em player.tscn. O personagem deve aparecer no centro da janela de exibição.
Adicionando uma câmera
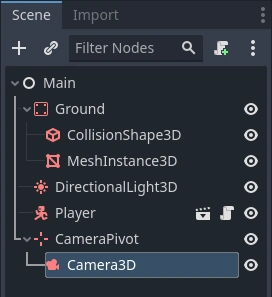
Let's add the camera next. Like we did with our Player's Pivot, we're
going to create a basic rig. Right-click on the Main node again and select
Add Child Node. Create a new Marker3D, and name it CameraPivot.
Select CameraPivot and add a child node Camera3D to it.
Your scene tree should look similar to this.
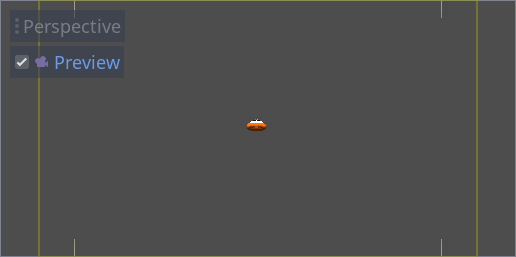
Notice the Preview checkbox that appears in the top-left of the 3D view when you have the Camera selected. You can click it to preview the in-game camera projection.

Vamos usar o Pivô para girar a câmera como se estivesse em uma grua. Vamos primeiro dividir a visualização 3D para poder navegar livremente pela cena e ver o que a câmera vê.
Na barra de ferramentas logo acima do janela de exibição, clique em Ver, depois 2 Viewports. Você também pode pressionar Ctrl + 2 (Cmd + 2 on macOS).
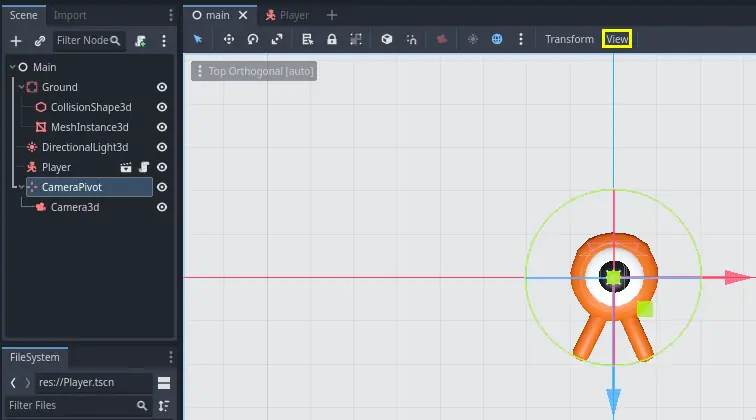

Na visualização inferior, selecione sua Camera3D e ative a pré-visualização da câmera clicando na caixa de seleção.
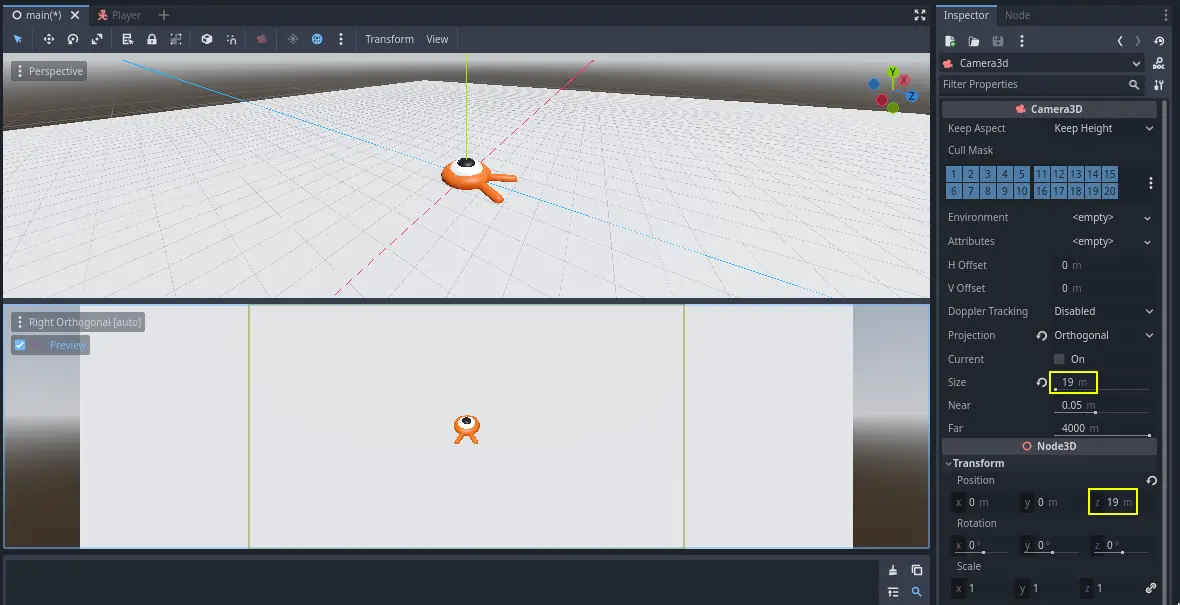
In the top view, make sure your Camera3D is selected and move the camera about
19 units on the Z axis (drag the blue arrow).
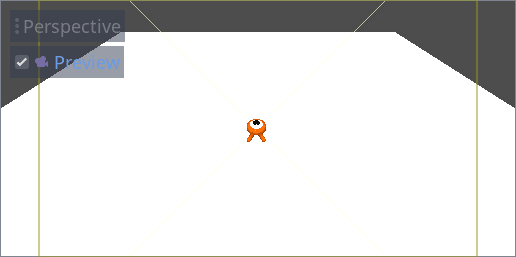
Here's where the magic happens. Select the CameraPivot and rotate it -45
degrees around the X axis (using the red circle). You'll see the camera move as
if it was attached to a crane.
You can run the scene by pressing F6 (Cmd + R on macOS) and press the arrow keys to move the character.
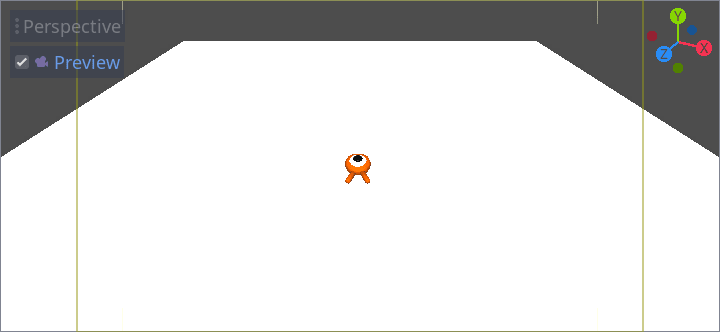
Podemos ver algum espaço vazio em torno do personagem devido à projeção em perspectiva. Neste jogo, vamos usar uma projeção ortográfica para melhor enquadrar a área de jogo e facilitar para o jogador ler as distâncias.
Selecione a Câmera novamente e no Inspetor, defina a Projeção para Ortogonal e o Tamanho para 19. O personagem agora deve parecer mais achatado e o chão deve preencher o fundo.
Nota
When using an orthogonal camera in Godot 4, directional shadow quality is dependent on the camera's Far value. The higher the Far value, the further away the camera will be able to see. However, higher Far values also decrease shadow quality as the shadow rendering has to cover a greater distance.
Se sombras direcionais parecerem muito borradas depois de mudar para uma câmera ortogonal, diminua a propriedade Far da câmera para um valor mais baixo, como ``100`. Não diminua esta propriedade Far demais, ou objetos à distância começarão a desaparecer.
Teste sua cena e você deve ser capaz de se mover em todas as 8 direções e não bugando através do chão!
Com isso, temos tanto o movimento do jogador quanto a visão no lugar. Em seguida, trabalharemos nos monstros.