Cena do Jogador e ações de entrada
Nas próximas duas lições, projetaremos a cena do jogador, registraremos ações de entrada personalizadas e codificaremos o movimento do jogador. Ao final, você terá um personagem jogável que se move em oito direções.
Create a new scene by going to the Scene menu in the top-left and clicking New Scene.

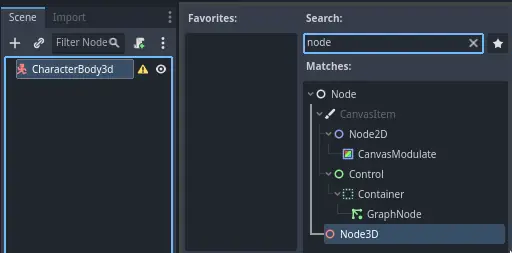
Clique no botão Outro Nó e selecione o tipo de nó CharacterBody3D para criar um CharacterBody3D como nó raiz.

Rename the CharacterBody3D to Player.
Character bodies are complementary to the area and rigid bodies used in the 2D
game tutorial. Like rigid bodies, they can move and collide with the
environment, but instead of being controlled by the physics engine, you dictate
their movement. You will see how we use the node's unique features when we code
the jump and squash mechanics.
Ver também
Para aprender mais sobre os diferentes tipos de nodos físicos, veja Introdução à física.
Por enquanto, vamos criar um rig básico para o modelo 3D do nosso personagem. Isso nos permitirá girar o modelo posteriormente via código enquanto ele reproduz uma animação.
Add a Node3D node as a child of Player.
Select the Player node in the Scene tree and click the "+" button to add a child node.
Rename it to Pivot.
Then, in the FileSystem dock, expand the art/ folder
by double-clicking it and drag and
drop player.glb onto Pivot.

This should instantiate the model as a child of Pivot.
You can rename it to Character.

Nota
The .glb files contain 3D scene data based on the open source glTF 2.0
specification. They're a modern and powerful alternative to a proprietary format
like FBX, which Godot also supports. To produce these files, we designed the
model in Blender 3D and exported it to glTF.
As with all kinds of physics nodes, we need a collision shape for our character
to collide with the environment. Select the Player node again and add a child node
CollisionShape3D. In the Inspector, on the Shape property,
add a new SphereShape3D.
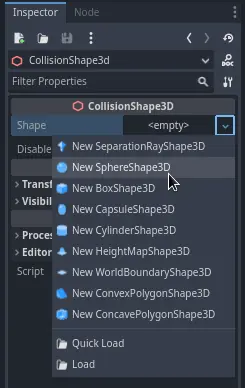
O wireframe da esfera aparece abaixo do personagem.

It will be the shape the physics engine uses to collide with the environment, so
we want it to better fit the 3D model. Make it a bit larger by dragging the orange
dot in the viewport. My sphere has a radius of about 0.8 meters.
Then, move the collision shape up so its bottom roughly aligns with the grid's plane.

To make moving the shape easier, you can toggle the model's visibility by clicking
the eye icon next to the Character or the Pivot nodes.

Save the scene as player.tscn.
Com os nós prontos, podemos quase começar a codificar. Mas primeiro, precisamos definir algumas ações de entrada.
Criando ações de entrada
Para mover o personagem, vamos escutar a entrada do jogador, como pressionar as teclas de seta. Em Godot, embora possamos escrever todas as combinações de teclas em código, há um sistema poderoso que permite atribuir um rótulo a um conjunto de teclas e botões. Isso simplifica nossos scripts e os torna mais legíveis.
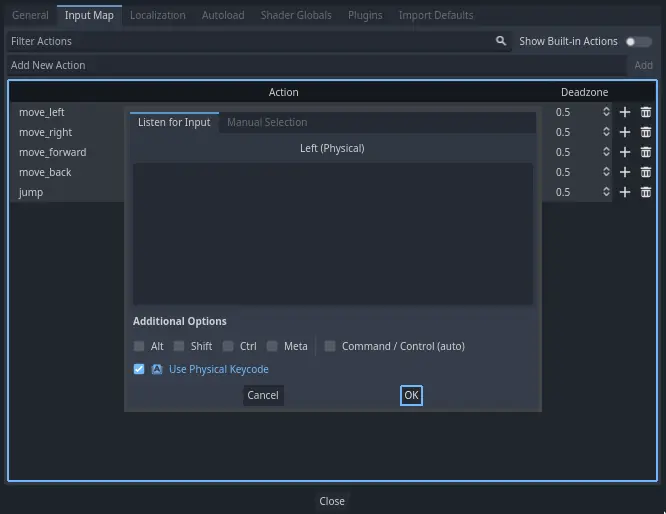
This system is the Input Map. To access its editor, head to the Project menu and select Project Settings....

At the top, there are multiple tabs. Click on Input Map. This window allows you to add new actions at the top; they are your labels. In the bottom part, you can bind keys to these actions.

Godot projects come with some predefined actions designed for user interface design (see above screenshot). These will become visible if you enable the Show Built-in Actions toggle. We could use these here, but instead we're defining our own to support gamepads. Leave Show Built-in Actions disabled.
Vamos nomear nossas ações move_left, move_right, move_forward, move_back e jump.
To add an action, write its name in the bar at the top and press Enter or click the Add button.

Create the following five actions:

To bind a key or button to an action, click the "+" button to its right. Do this
for move_left. Press the left arrow key and click OK.
Atribua também a tecla A, para a ação move_left.

Let's now add support for a gamepad's left joystick. Click the "+" button again but this time, select the input within the input tree yourself. Select the negative X axis of the left joystick under Joypad Axes.
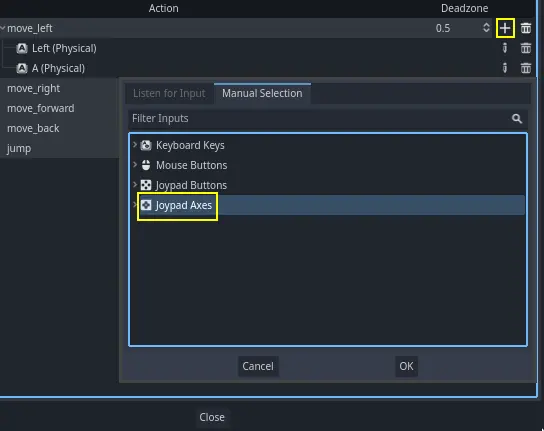
Leave the other values as default and press OK.
Nota
Se você quiser que os joysticks tenham diferentes ações de entrada, você deve usar a opção Dispositivos em Opções Adicionais. O dispositivo 0 corresponde ao primeiro gamepad plugado, o dispositivo 1 corresponde ao segundo gamepad plugado, e assim por diante.
Do the same for the other input actions. For example, bind the right arrow, D,
and the left joystick's positive axis to move_right. After binding all keys,
your interface should look like this.

The final action to set up is the jump action. Bind the Space key and the gamepad's
A button located under Joypad Buttons.

Sua ação de entrada de salto deve se parecer com isso.

Essas são todas as ações que precisamos para este jogo. Você pode usar este menu para rotular quaisquer grupos de teclas e botões em seus projetos.
Na próxima parte, nós iremos programar e testar o movimento do jogador.